- Stitch >
- Application Deployment >
- Deploy App Changes
Deploy from the Stitch UI
Overview
When you make changes to your application through the Stitch UI, those changes are saved in a draft state. Draft changes do not affect your production application and are invisible to end users. This is particularly useful in situations where you need to make related changes to multiple components in your application and want to avoid bugs and a loss of functionality during the transition. When you want to publish your changes, you can manually deploy them through the Stitch UI.
Procedure
Make Changes to Your Application
A deployment contains one or more draft changes that you’ve made to your application since the previous deployment. To set up a new deployment, make any additions, modifications, or deletions that you want to include in the deployment through the Stitch UI.
Note
You can only create draft changes through the Stitch UI or Admin API. Any changes that you make with git or the Stitch CLI are deployed independently of draft changes.
Review Draft Changes
You can review all of the draft changes to your application prior to deploying them.
Click Deploy in the left-hand navigation to navigate to your app’s deployment history table. The top row of the table represents all of the draft changes that you’ve made since the previous deployment.
Click the Review & Deploy Changes button in the top row to see a diff of the underlying app configuration files that represents the draft changes that you’ve made.
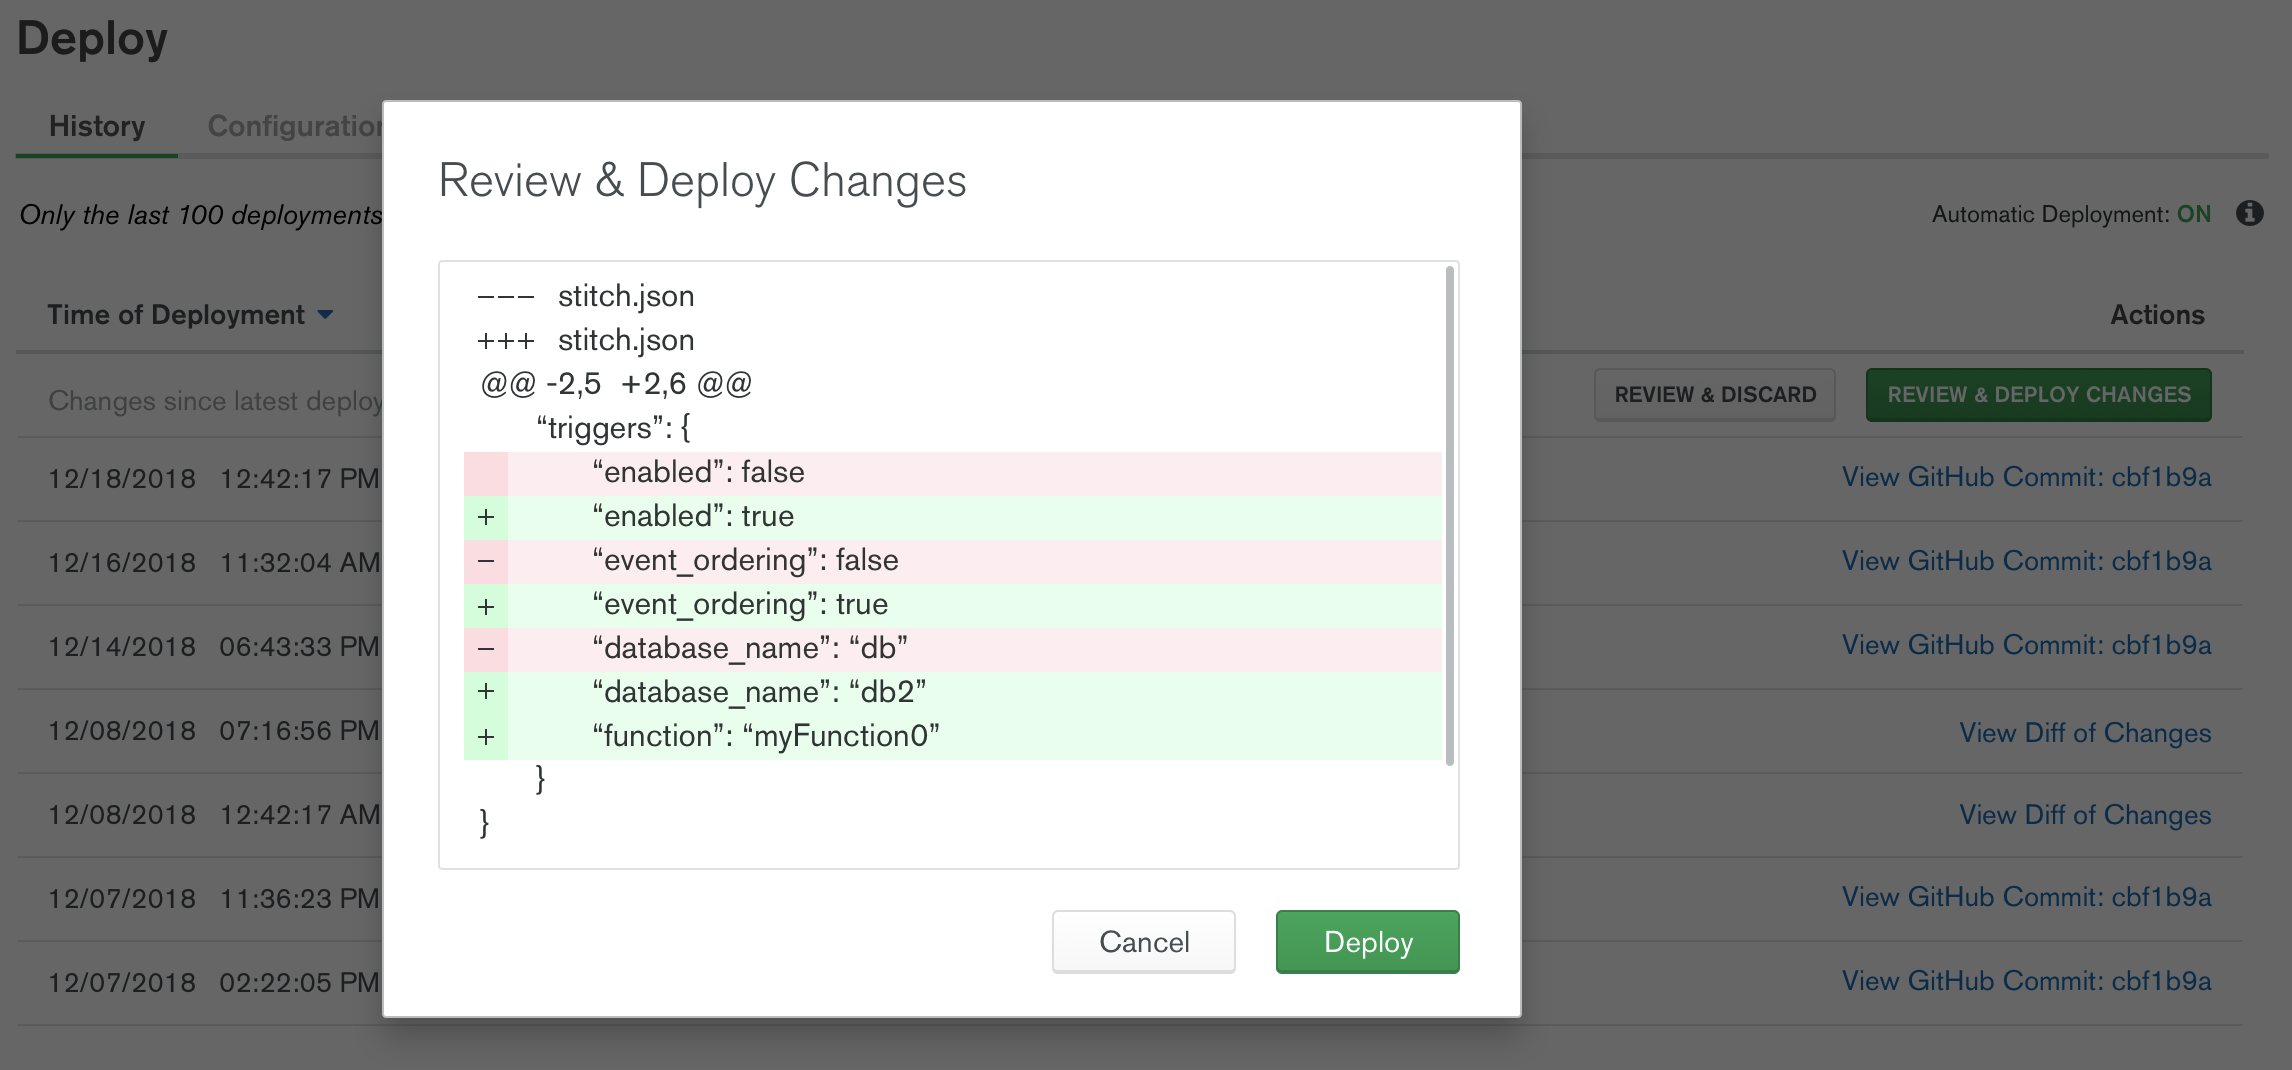
Deploy a New App Version
After you’ve reviewed your draft changes and confirmed that you want to deploy them, click Deploy. Stitch immediately deploys a new version of your application that includes the draft changes. Client applications will automatically use the newest version, so make sure that you also update your client code to use the new version if necessary.