- Stitch >
- Users & Authentication >
- Authentication Providers
Apple ID Authentication
Overview
The Apple ID authentication provider allows users to log in with their Apple ID credentials through Sign in with Apple. This authentication method uses the industry-standard OAuth 2.0 authorization protocol.
When a user successfully logs in through Sign in with Apple, Apple returns a credential object that includes a JSON Web Token that the provider uses to authenticate the user. The credential may also include the user’s name and email address if they have granted your app permission to access them.
For additional information on how to implement Sign in with Apple, check out the Introducing Sign In with Apple session from WWDC 2019 and the associated reference application.
Only Available on iOS
Apple ID authentication is currently only available through the iOS client SDK for apps that target iOS 13 or newer.
Configure Apple ID Authentication
Create an App ID
An Apple App ID represents your application and allows you to access services like Sign in with Apple. To configure the Apple ID provider, you must create a new App ID.
- Navigate to the Certificates, Identifiers and Profiles page of the Apple Developer Portal.
- Click Identifiers in the left-hand navigation.
- Click the blue plus icon next to Identifiers.
- On the Register a New Identifier page, select App IDs and then click Continue.
- On the Register an App ID page, select the Platform that your app runs on and then enter a brief Description and a reverse-dns notation Bundle ID.
- Scroll down the Register an App ID page until you see the Sign in with Apple capability. Check the checkbox to enable the capability.
Create a Services ID
An Apple Services ID represents a single application and allows you to configure authorization callback URL and define a private key for the application.
Click Identifiers in the left-hand navigation.
Click the blue plus icon next to Identifiers.
On the Register a New Identifier page, select Services IDs and then click Continue.
On the Register a Services ID page, enter a brief Description and a reverse-dns notation Identifier.
Save the Identifier
The Identifier value of the Services ID is your application’s Client ID. You will need this value later to configure the Apple ID provider in Stitch.
Check the checkbox to enable Sign in with Apple and then click Configure. Select the App ID that you created as the Primary App ID.
Click Save and then click Continue. Confirm that you have correctly configured the Services ID and then click Register.
Create a Private Key
The client secret for Sign in with Apple is a JSON Web Token that you create and sign with a private key. You need to generate the private key through the Apple Developer Portal.
Click Keys in the left-hand navigation.
Click the blue plus icon next to Keys.
On the Register a New Key page, enter a descriptive Key Name and then scroll down to find the Sign in with Apple row. Check the checkbox to enable Sign in with Apple and then click Configure.
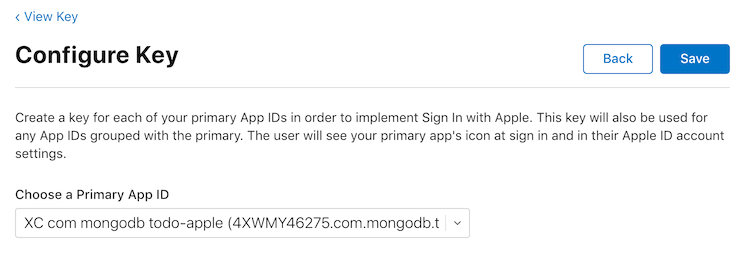
On the Configure Key page, select the App ID that you created as the Primary App ID and then click Save.
Click Continue to review your key configuration. When you’re sure that you’ve configured the key correctly, click Register. Save.
Note down the Key ID and then click Download to download the key as a
.p8text file. You will use these to generate the client secret.Save the Key
You can only download the key one time. Make sure that you save the key someplace safe in case you need it again. If you lose the key, you will need to generate a new one.
Create the Client Secret JWT
You can now create the client secret JWT for the Apple ID authentication provider. Make sure that you have the following information:
The Services ID that you created.
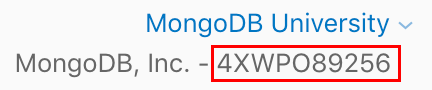
The Key ID of the key that you created and the
.p8file that contains the key.Your Apple Team ID. You can find this in the top right of the Apple Developer Portal.
Once you’ve confirmed that you have all the required information,
create a new file called generate_client_secret.rb and copy the
following code block into the file.
Update the values of team_id, client_id, key_id, and
key_file to match your application’s information and then save
the file. When you’re ready to generate the JWT, run the script in
your shell:
Save the JWT
The generate_client_secret.rb script saves the JWT string to a
file called client_secret.txt. You will need the JWT to
configure the Apple ID provider in Stitch.
Configure Stitch
At this point you have configured an Apple application and generated the required OAuth 2.0 credentials. You can now configure the Apple ID authentication provider with the credentials to allow Stitch client application users to log in.
- Stitch UI
- Import/Export
Click Users in the left-hand navigation, select the Providers tab, and then click Apple ID.
Turn on the Provider Enabled toggle.
For Client ID, enter the Services ID that you created.
For Client Secret, create a new secret with a descriptive name and set the Client Secret Value to the JWT string that you generated. Alternatively, you can select a pre-existing secret that contains the JWT.
For Redirect URIs, click Add Redirect URI and enter the URL that Stitch should redirect to once the OAuth process is complete. Once a user completes the authentication process, Stitch redirects them back to either a specified redirect URI or, if no redirect URI is specified, the URL that they initiated the authentication request from. Stitch will only redirect a user to a URI that exactly matches an entry in this list, including the protocol and any trailing slashes.
Consider providing a URL for a domain that you control and then using a universal link to handle authentication in your app.
Click Save to finish configuring the provider. To make the provider available to client applications, you need to deploy your changes. Click Review & Deploy Changes and then click Deploy.
Create a configuration file for the provider in your exported
application directory at the path
/auth_providers/oauth2-apple.json. The configuration file
should have the following form:
| Field | Description |
|---|---|
Client ID config.clientId
|
Required. The Services ID that you created. |
Client Secret secret_config.clientSecret
|
Required. The name of a Secret that stores the Client Secret JWT that you generated. |
Redirect URIs redirect_uris
|
Required for web applications. A list of allowed redirect URIs. Once a user completes the authentication process, Stitch redirects them back to either a specified redirect URI or, if no redirect URI is specified, the URL that they initiated the authentication request from. Stitch will only redirect a user to a URI that exactly matches an entry in this list, including the protocol and any trailing slashes. Consider providing a URL for a domain that you control and then using a universal link to handle authentication in your app. |
Once you’ve created the configuration file, you can make the Apple ID authentication provider available to client applications by deploying your application.
To deploy a draft application with Stitch CLI:
To deploy a draft application with automatic GitHub deployment:
Set Up Your Client Application
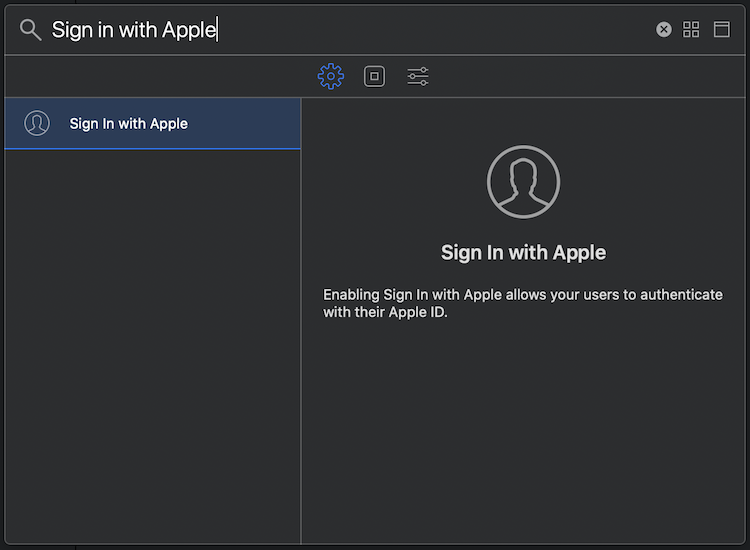
Add the Sign in with Apple Capability
You must grant your client application permission to use Sign in with Apple by defining a capability.
In XCode, select your application and then click Signing & Capabilities. Click + Capability and add the Sign in with Apple capability. You can now import the AuthenticationServices package in your login view controller.
Add the Sign in with Apple Button
Apple provides a standard, pre-styled button that you can use to initiate the Sign in with Apple flow. In your login view controller, instantiate a Sign in with Apple button and add it to the view.
For additional information on how to use the Sign in with Apple button, see the Sign in with Apple Human Interface Guidelines.
Define the Authorization Request Handler
When a user presses the Sign in with Apple button, your app needs to construct and send an authorization request. This request triggers the Sign in with Apple flow for the user.
In your login view controller, add the following handler function:
Only Request Necessary Scopes
You can request the user’s full name and valid email address as
part of your app’s authorization. This data is sensitive so only
request these scopes if your application requires them. If you
don’t need a particular scope, do not include it in
requestedScopes.
Authenticate with Stitch
Once a user completes the Sign in with Apple flow, Apple returns a
credential object that contains an identityToken
that identifies the user. Access the identityToken in the
authenticationController protocol and use it to construct a
Stitch AppleCredential. You can then log in to Stitch using the
credential.